

















- Tips on machining 2017/03/16 UP
-
Tips on machining vol.5
Effective burr handling in face milling
-Aluminum alloy-

- Tag
-
- Deburring
- Milling
- Aluminum
When a cutting tool leaves the workpiece, a part of the workpiece is pushed down outwardly by cutting force. This small piece of material remaining on the surface is a burr. A burr, in general, is formed (at the exit side) when the tool leaves the workpirce, whereas almost no burrs are formed (at the entrance side) when the tool enters the workpiece. However, burrs can be formed at the entrance side when a worn tool tip is used.
Basically, there are two approaches to dealing with burrs. One is to minimize burr formation (that is, prevent burrs from forming). The other is to remove burrs properly in the subsequent process.
In the former approach, the most common way is to make a disengage angle larger. A disengage angle is an angle at which the tool leaves (disengages) the workpiece. The angle can be adjusted by the positional adjustment between the face-milling cutter and the workpiece, or the size adjustment of the face-milling cutter.

When a disengage angle is small, burrs are likely to be formed because cutting force that occurs when the tool leaves the workpiece acts on the outside of the workpiece, causing the corners of the workpiece to bend. On the other hand, when a disengage angle is large, burrs are less likely to be formed because cutting force when the tool leaves the workpiece becomes closer to parallel to the feed direction.
Note, however, that an excessively large disengage angle (approximately 80°) could generate larger burrs. So it is necessary to predict the disengage angle at which burrs are least likely to occur based on the specification of the face milling cutter, cutting conditions and workpiece material.


If the disengage angle cannot be adjusted, burrs can be suppressed by minimizing cutting force that acts on the outside of the workpiece. There are two ways to minimize cutting force: (1) applying some ingenuity to cutting tools or (2) applying some ingenuity to workpieces. The first one includes: using a rounded tool tip, optimizing the front cutting edge, and employing a diamond tip to achieve sharper cutting edge. The second one includes: performing chamfering by an amount equal to the cutting depth of the workpiece. Prior chamfering allows for smaller depth of cut when the tool leaves the workpiece, resulting in smaller cutting force and fewer burrs.
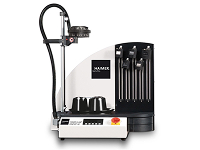
The latter approach, removing burrs in the subsequent process, uses a ceramic brush. A ceramic brush is attached to a holder with built-in springs so that a constant force can be applied to the workpiece even if the tip of a ceramic brush has been worn down, and stable deburring is ensured. However, this method has a disadvantage: brush scars are likely to remain on the workpiece surface. So, it is necessary to perform masking on the workpiece surface to prevent brush scars from remaining on the surface.
If you wish to remove burrs after machining, it is recommended that you think about ways to make burrs as small as possible (to make roots shallow) in the machining process because large burrs (which have deep roots) require a lot of time and effort to remove.
DMG MORI has been working on burr-related challenges to solve each and every customer problem. At our two Solution Centers in Japan, you can consult with our machining engineers in person about deburring.
So, please feel free to consult with our machining engineers for any questions or concerns you may have.
- Relevant contents